Device logs tab
This page has been automatically translated and has not been reviewed in detail yet. Therefore, the translation might not be completely accurate.
In this tab you can define so-called PRT files, which are used by the network and serial providers. These PRT protocols define which actions and events selected components of these providers have and how technical communication takes place. See chapter (PRT files / PRT file format) for details.
Attention: Existing files should only be edited with appropriate specialist knowledge!
New PRT and Raw files can be added using the "Add configuration" button at the top left:
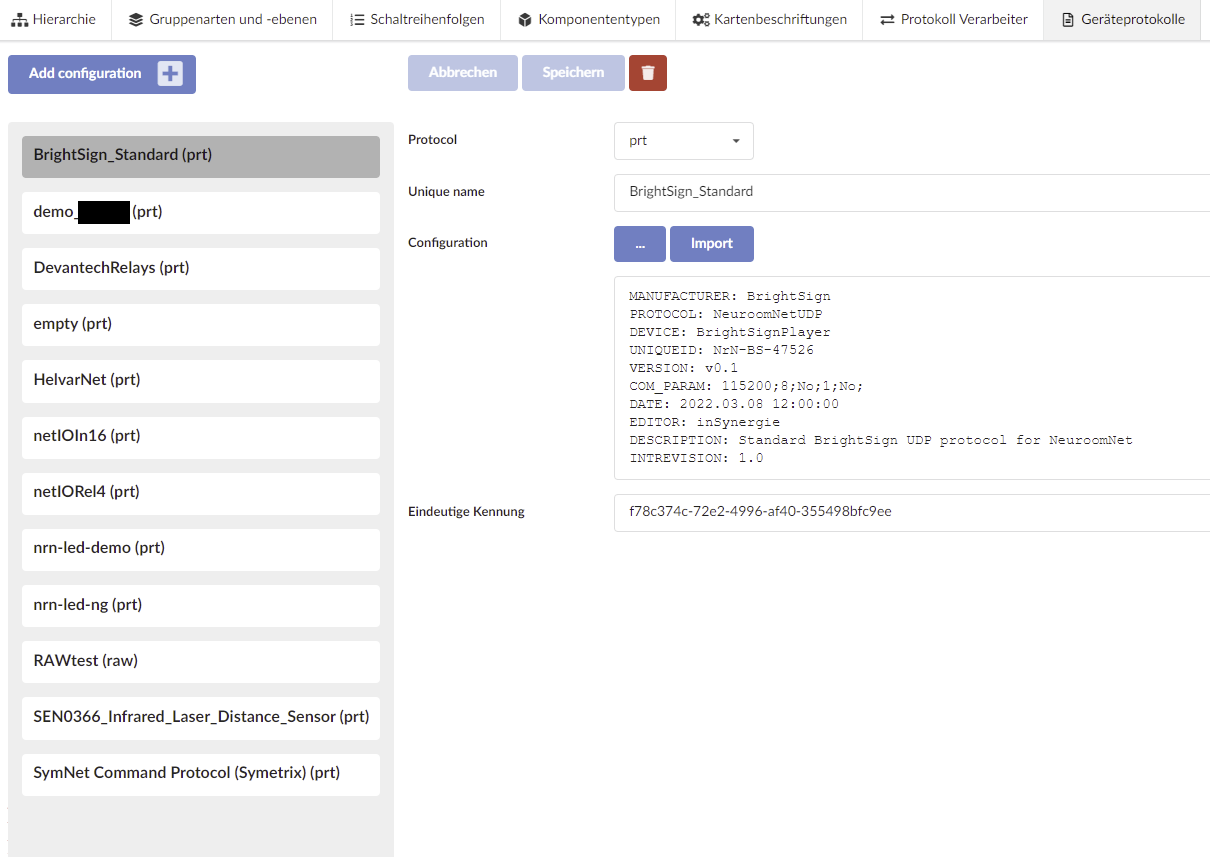
Loading PRTs
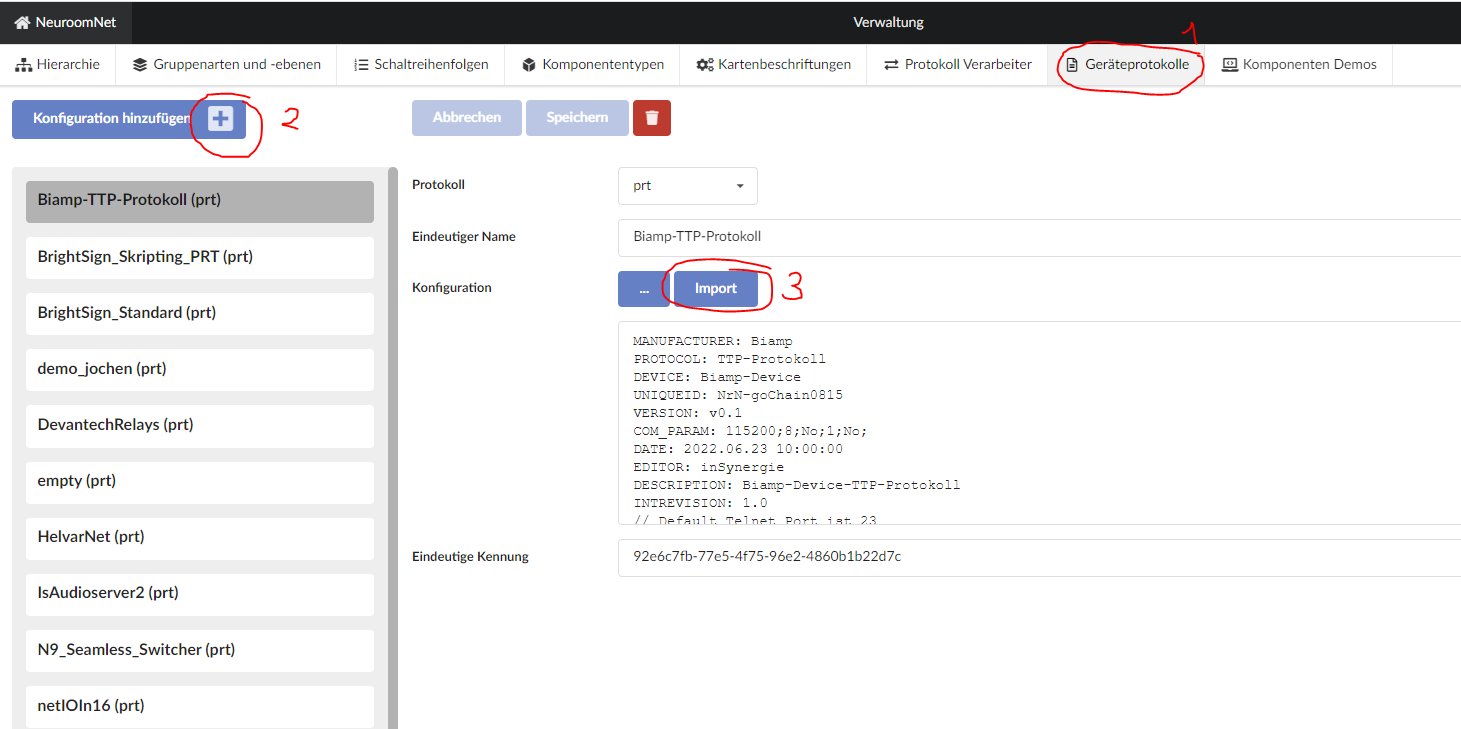
Under Setup > Device Protocols click on “Add configuration +” at the top left.
Load offline file
Offline files can be loaded from a local directory using the "..." button.
(The PRTs can be copied over from the Z:\NeuroomNet\PRT directory, for example)
Load PRT from online library
Our PRT protocols are also already stored in the cloud library.
Danger! The protocols must be imported into the system while the computer has Internet access!
To do this, press the “Import” button in the middle to open the dialog.
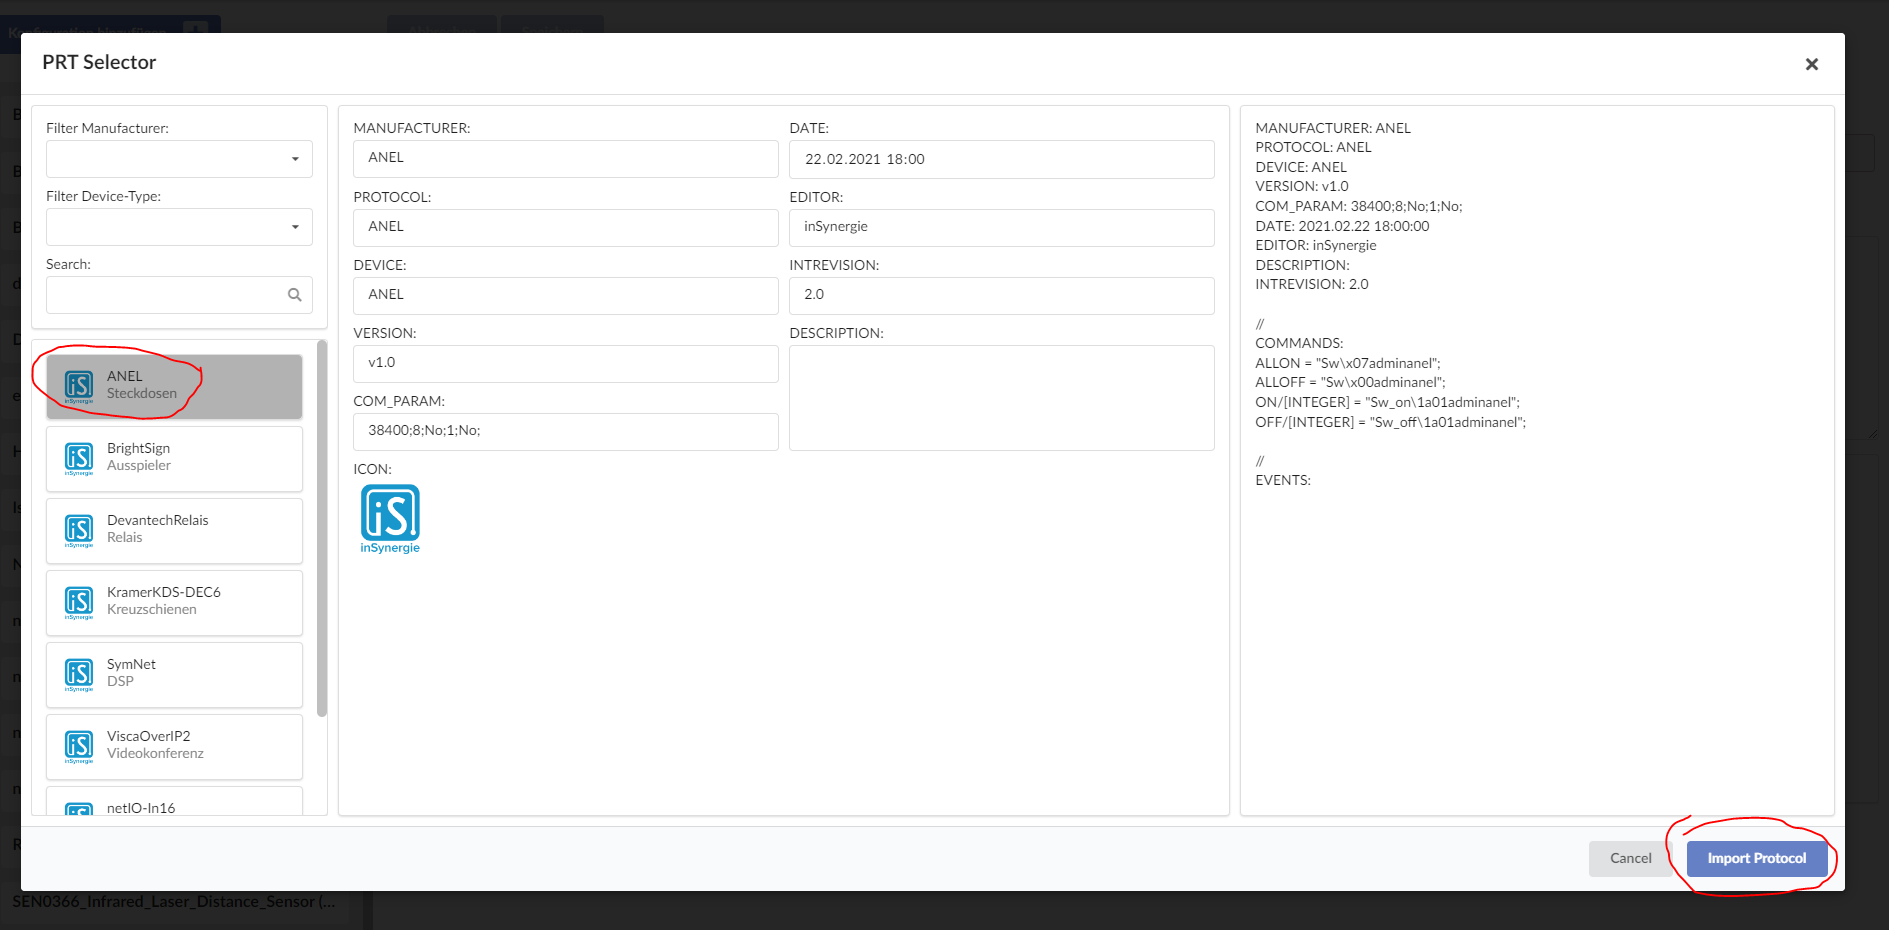
In the new dialog you can filter by criteria on the left side. Otherwise, a PRT entry can also be clicked directly. Confirm at the bottom right to load the PRT file:
Finally, don’t forget to save.
How can the protocols be assigned to components?
If a PRT protocol is available centrally in the Device Protocols tab in your own NeuroomNet server (through creation or import, see above), then this PRT protocol can be added to components as follows:
- When creating new components in the Setup module (Hierarchy tab, via the "New Components" button), Provider Network or Serial must be selected and then the PRT file under Translation-rule-set
- When editing existing components with Provider Network or Serial, the PRT file can of course also be selected/changed under Translation-rule-set in the Setup module
Example: Creating a component to control a BrightSign Player via Provider Network and PRT
To illustrate, the following example where we create a component that represents a BrightSign player in the foyer of our building and is to be controlled via PRT:
After importing the PRT "BrightSign_Standard(prt)" in the Device Protocols tab, we create the component "BrightSign Player Foyer" in the Hierarchy tab with Provider Network and the PRT file "BrightSign_Standard(prt)" as a translation rule set:
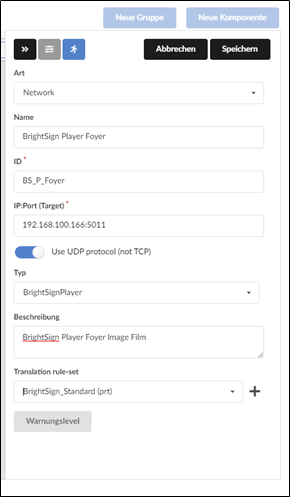
“Type” and “Description” are optional. There is more information about the use of the type below (keyword: use of a dedicated user-defined component type).
After saving, the component can be used.
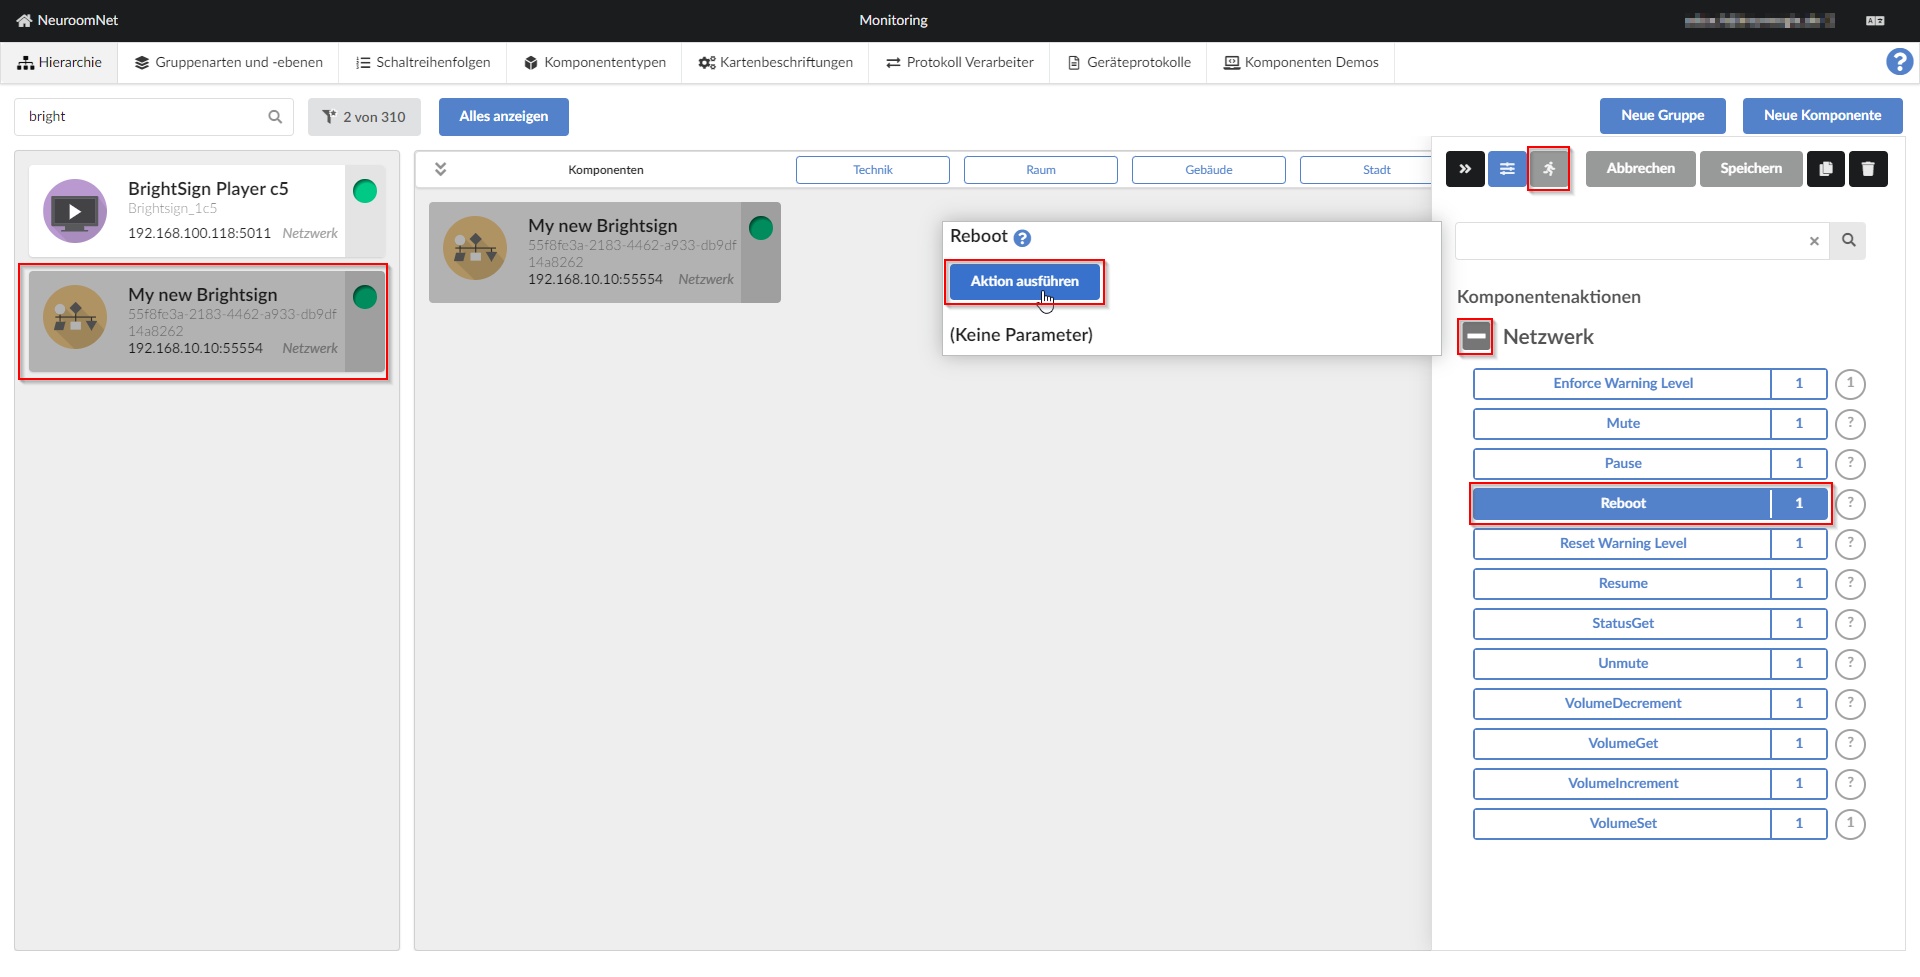
After creating the component, you should check whether it is set up correctly. To do this, press the “Component Actions” button with the icon of the running figure. All actions that were stored in the log are then displayed. In this example, “Reboot” is selected and by pressing the “Execute action” button, the NeuroomNet command is sent to the device and the device should restart. If the device does not respond, please check the previous entries again, check the network and/or the BrightSign project file. Otherwise, setting up the component is now complete.
Tip: Use custom component types
For a better overview of the individual components in the NeuroomNet system, it is recommended to create and assign a new component types for components that use the same rule sets / PRTs:

In this case, the component type has the name “BrightSignPlayer” and a suitable icon has also been stored. Two NeuroomNet interfaces, named “Network and Serial”, were assigned to the component type.
The unique identifier is created and managed automatically by the system.