Group levels and types tab
This page has been automatically translated and has not been reviewed in detail yet. Therefore, the translation might not be completely accurate.
What group levels and types are and how they relate to each other was explained in the previous chapter.
The levels divide the hierarchy into groups and subgroups.
The species help to categorize and distinguish the equivalent groups at one level.
This chapter is about creating new levels and types.
But they only create the framework of the hierarchy, which later has to be filled with concrete groups!
Add group levels
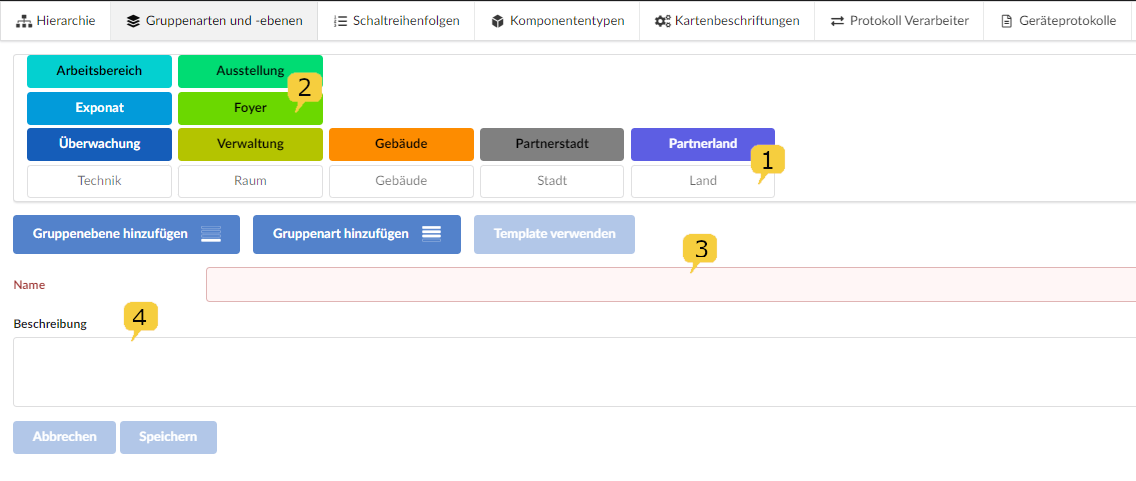
The group levels 1 with a gray background are arranged horizontally and hierarchically. The different group types highlighted in color 2 are positioned above the group levels. The arrangement of the group types can be changed using drag & drop.
To create a group layer, click the "Add Group Layer" button. It is enough to specify a name 3 and save, a description 4 is optional.

Add group type
Once the group level has been created, a group type can be created for this level.
Click on the “Add group type” button.
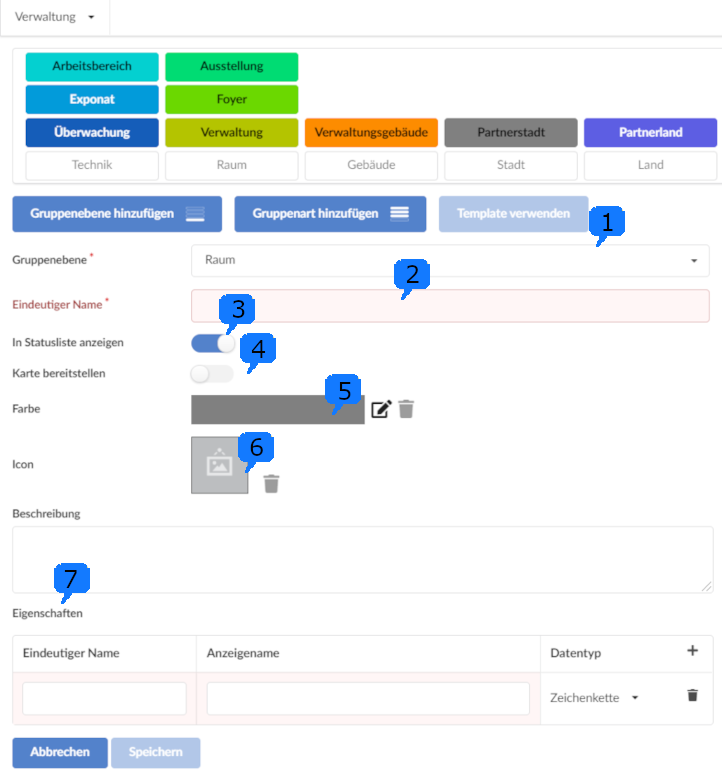
Then the higher-level group level must first be selected 1 and a unique name 2 must be assigned for the group type.
The option "Show in status list" 3 is used to show or hide the group type in the status list in monitoring. This makes sense because components are inevitably contained in several groups. In monitoring, for example, B. the exhibit and the building are displayed and all intermediate levels are not.
If the "Provide map" 4 controller is activated, when a group is created (see Hierarchy Create a group), the option to upload a site plan appears under "Map".
For better differentiation, the group type can be given a color 5 and an icon 6. In addition to a general description, other properties 7 can also be specified if necessary.
