Module Heatmap: Variable / Camera Mapping
This page has been automatically translated and has not been reviewed in detail yet. Therefore, the translation might not be completely accurate.
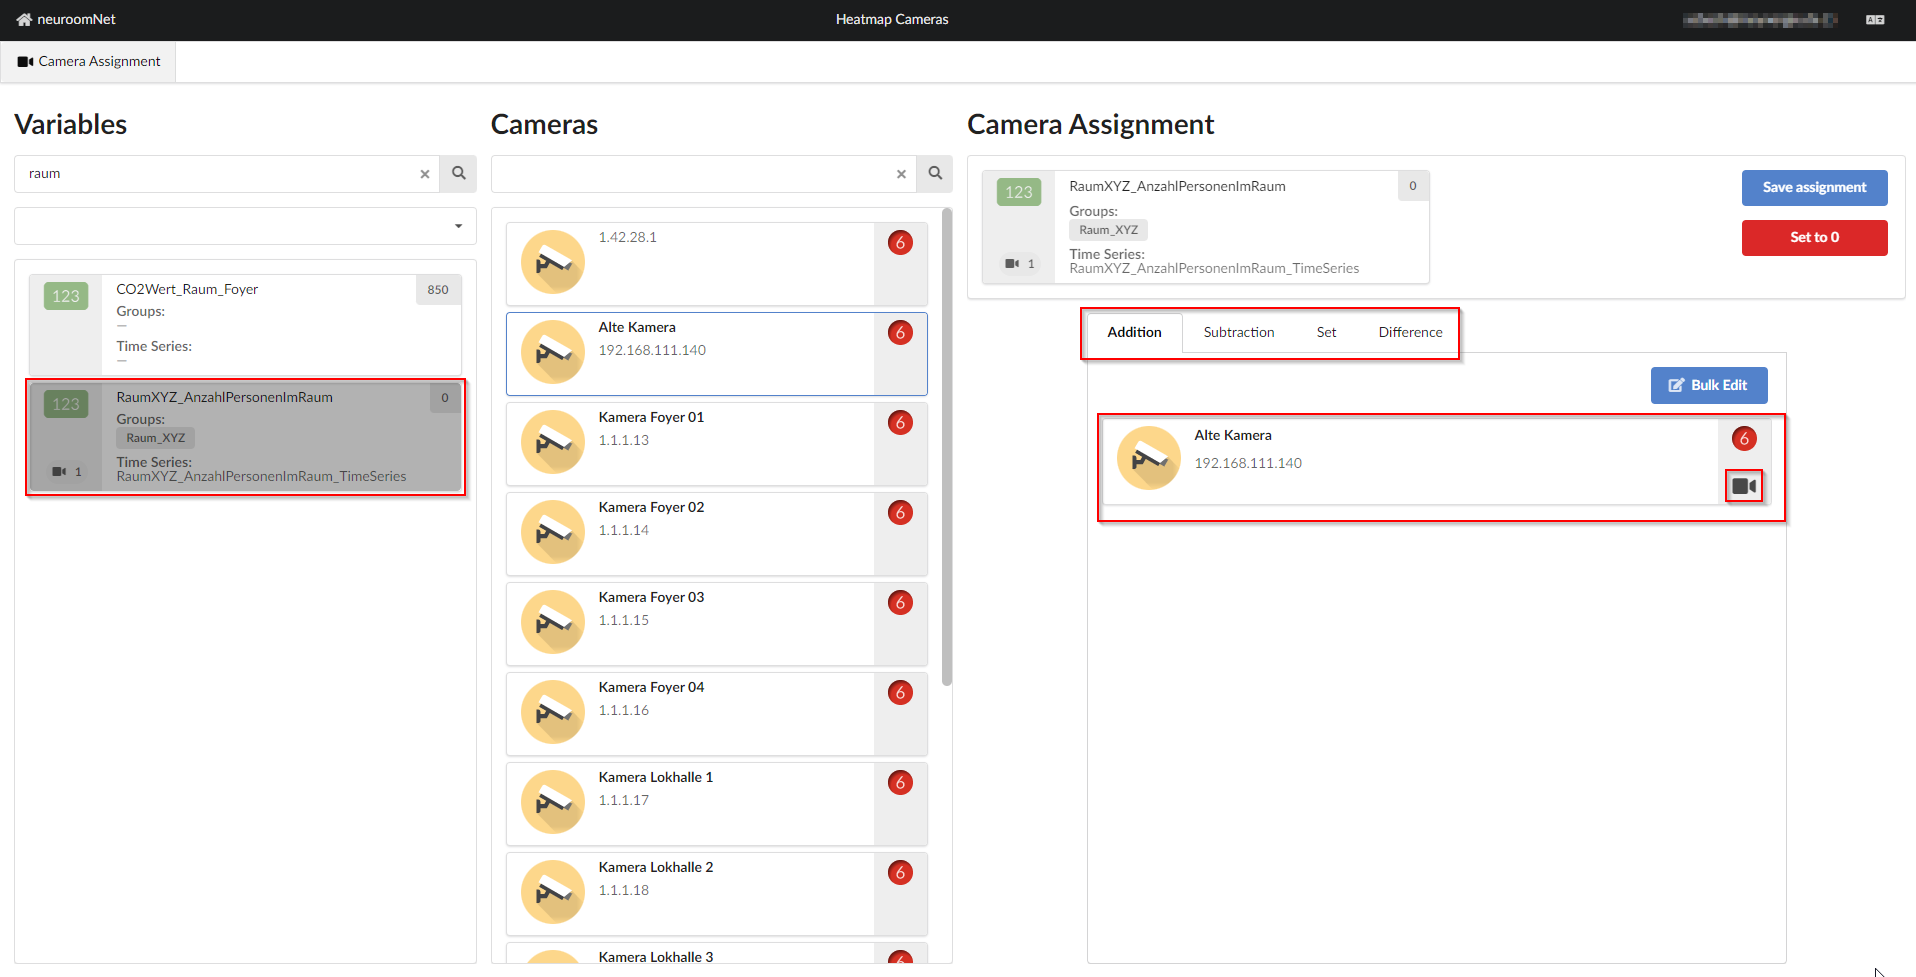
In the Heatmap module, cameras (i.e. components with provider heatmap) are assigned to variables (particularly to room variables) in the "Camera assignment" tab:

In this interface, a variable is selected in the left part ("Variables") and cameras from the middle part ("Cameras") can then be assigned to it by dragging and dropping into the right part in the following sections/tabs:
- Addition: The change (to the last value) of the respective camera counter is added to the variable
- Subtraction: The change (to the last value) of the respective camera counter is subtracted from the variable
- Set: The variable is set exactly to the count of the respective camera counter
- Difference: The variable is set to the change (to the last value) of the respective camera counter
The direction of the camera icon also plays a role (this can be reversed by clicking):
- Camera filming to the right: The camera's forward counter is used here
- Camera filming to the left: The camera's reverse counter is used here
To explain the 4 different sections or counting modes, so to speak, use the following example:
Assumed,
- at 2:00 p.m. the following values are available:
- The value of the variable RoomXYZ_Number of PeopleInRoom is equal to 100,
- the value of the up counter of "Old Camera" is equal to 2500.
- and at 2:01 p.m. the forward number of "Old Camera" is 2512 (i.e. 12 people passed the area filmed by the camera in the forward direction between 2:00 p.m. and 2:01 p.m.)
The following table explains, using the following example, what the new value of the variable RoomXYZ_NumberPeopleInRoom will be at 2:01 p.m. for the 4 cases Addition, Subraction, Set and Difference:
| Case | Variable value at 2:01 pm |
|---|---|
| 1) Addition: The "Old Camera" in forward direction is added in Addition section (and no other camera/assignment) | 112 |
| 2) Subtraction: The "Old Camera" in forward direction is added in Subtraction section (and no other camera/assignment) | 88 |
| 3) Set: The "Old" camera in forward direction is added in section Set (and no other camera/assignment) | 2512 |
| 4) Difference: The "Old" camera in forward direction is added in Difference section (and no other camera/assignment) | 12 |
In general, the addition and subtraction modes can be used simultaneously for a variable and otherwise only the modes separately.
Practical examples and usage
In practice you will usually have two use cases:
- Variables that store the total number of people within a room
- Variables that store either entries or exits at an input
In the first case, for the variable you will normally have each camera for each entrance of the room once on the addition side and once on the subtraction side (with the camera flipped).
In the second case, you will usually have a camera in Difference mode (then the variable stores the deltas, so to speak) or a camera in Addition mode (then the variable stores an ever increasing counter).
Storage of the association
After defining the assignments to a variable, these assignments are saved using the “Save assignment” button.
You can also set the variable to 0 in this module using the “Set to 0” button (if you want to set the variable to 0 manually).